Omnik Data Logging
Logging solar data with Node-RED
Posted: November 10, 2022
Ever since Omnik’s online logging service became a subscription, I’ve been looking for solutions to log and visualize the inverter data myself.
I found out that I couldn’t add a remote server to my inverter, which made it impossible to easily use existing solutions such as OmnikPortal. That’s where my Node-RED based solution comes in, as it should be able to extract the data from any Omnik inverter.
How it works
This Node-RED solution works by making an HTTP request to the inverter, it does this every five minutes (by default, can be altered). It specifically asks for a file called status.js, which contains all the values of the inverter at the time of request.
The requested status file has the following array, containing inverter details and solar data:
myDeviceArray[0]="NLHN000000A00000,V5.19,V6.01,Omnik8000tl,8000,350,122,246053,F0,0,";
The data in this array can be extracted and parsed to the following:
{
    "serialNumber": "NLHN000000A00000",
    "mainFirmwareVersion": "V5.19",
    "slaveFirmwareVersion": "V6.01",
    "model": "Omnik8000tl",
    "ratedPower": 8000,
    "productionCurrent": 350,
    "productionToday": 12.2,
    "productionTotal": 24605.3
}
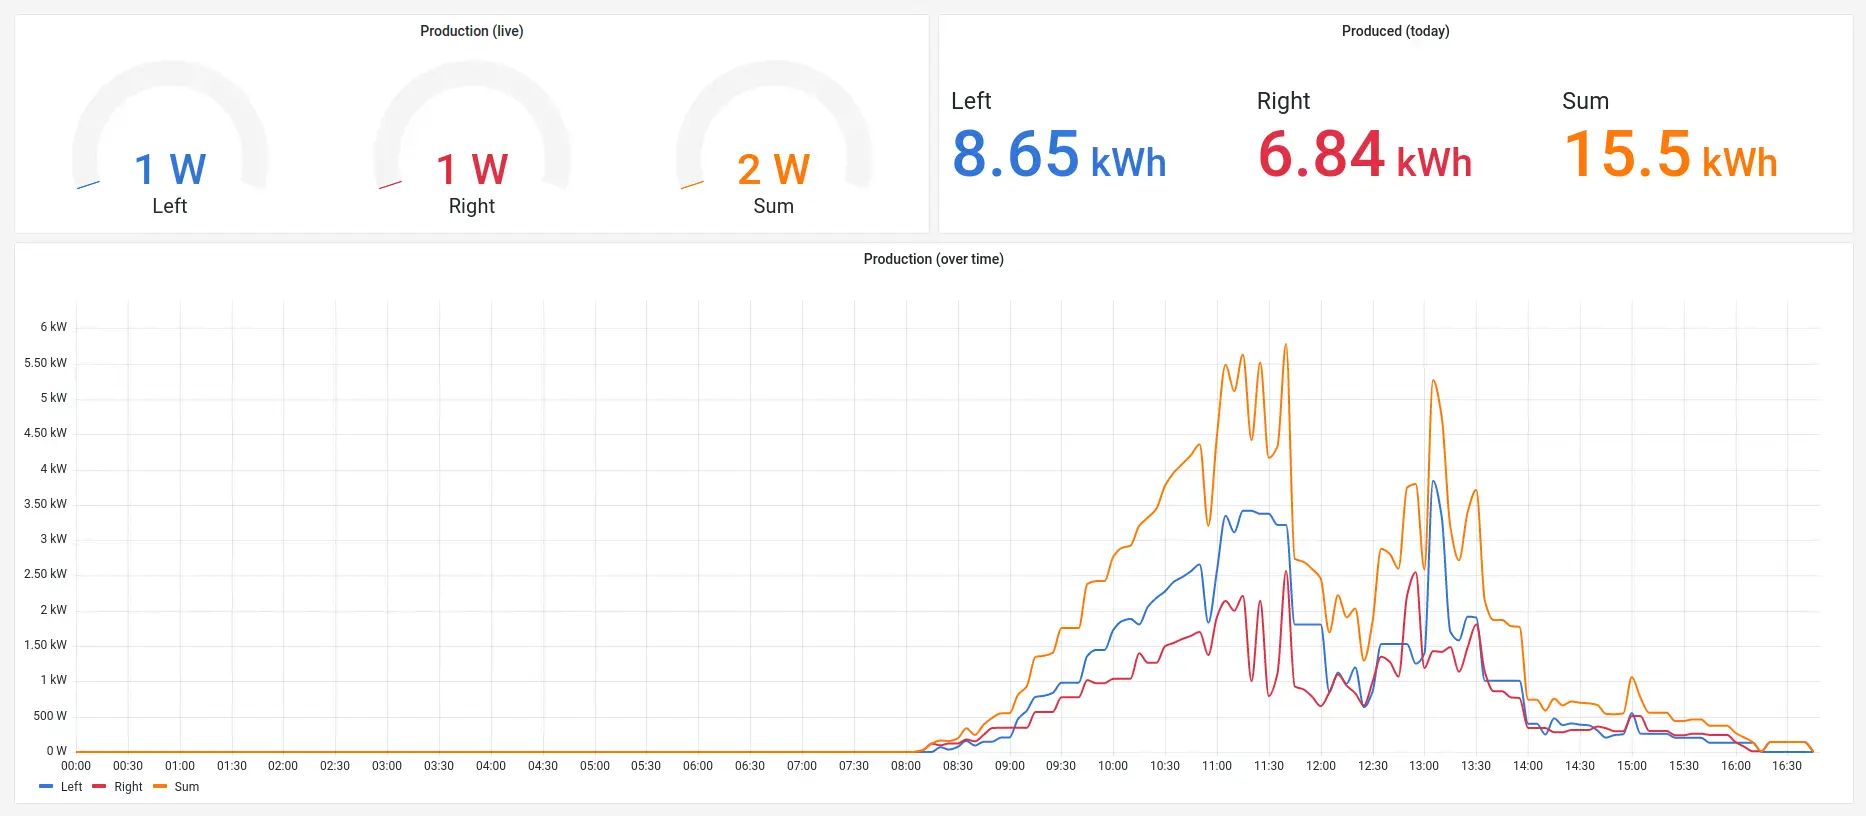
These values are then send as Node-RED messages, where they can be visualized on a dashboard, or logged to a database. The possibilities are virtually endless with Node-RED.
The following chapters will discuss how to set this all up, so you too can start logging your Omnik inverter using Node-RED.
Prerequisites
- A working instance of Node-RED, preferably on a device with network access to the inverter. Such as a Raspberry Pi on the local network, view Running on Raspberry Pi to get started.
- The network/IP address of the inverter.
- The login credentials to the inverter (username/password).
Setup
- Download the Node-RED Omnik Flow.
- Within your Node-RED dashboard, import the downloaded file with
ctrl+i. - Add your inverter IP and login credentials to get inverter status:
- URL:
http://<inverter-ip>/js/status.js - Username:
<inverter-username> - Password:
<inverter-password>
- URL:
- Press Deploy and inspect the debug view:
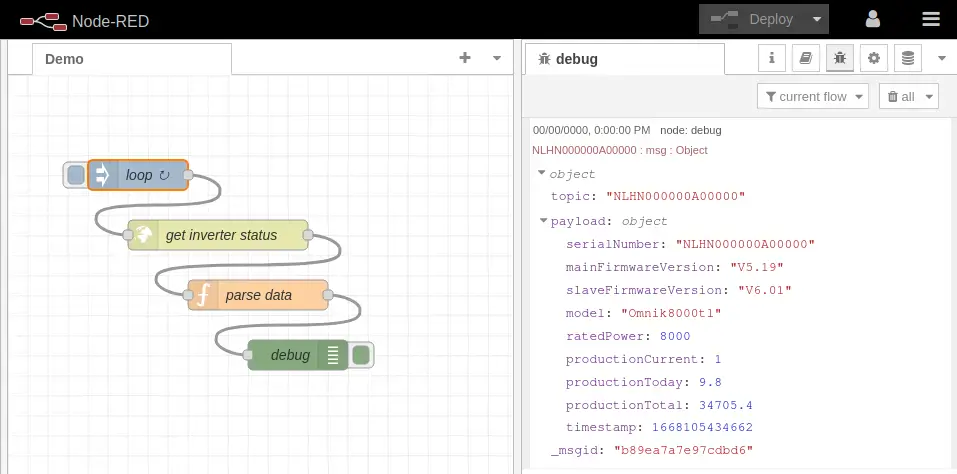
Note that these steps can be repeated if you have multiple inverters, make sure to use the correct IP address and login credentials for each inverter!
Start hacking
Congratulations, you now have your inverter data in Node-RED! But this is just the beginning, you can do all kinds of fun things within Node-RED. You could for example save the data to a database, file or cloud service. Or visualize it directly in a dashboard using node-red-dashboard or Grafana! – But I’ll leave this part up to you to figure out 😉